Saturday, turner Jim Meyer performed a very nice demonstration on turning object box style kaleidoscopes. Jim used segmented pieces to make the main barrel and rotational assemblies.
First, he glued together 2 pieces of contrasting wood to make up each of the three sides. The three sides were glued together to create a tube assembly with a triangular opening on the inside. The segmented tube was then turned round. A tenon was cut at both ends to create a rabbit joint to accept another assembly at both ends of the tube. The tube was set aside for later and a piece of dark wood was secured into the four jaw chuck to turn the end cap for the main tube assembly. A recess was cut to fit one of the tenons on the tube, and a hole was drilled into the center to create a viewing hole to see the object box through the tube. A larger recess was turned to hold a small plate of glass. A contrasting piece of wood was turned and fitted into the other side of the block. The hole was finished with a spray-on finish (Jim said it's very important to perform the finishing step on this area - at this point - to prevent damaging the glass plate), and the glass plate was secured into the piece with 5 minute epoxy. This glass is used to help focus the object box at the other end of the kaleidoscope. The block was then secured to the tube assembly using "Tight Bond" wood glue. The tube assembly was remounted and the end block was turned to match the tube. Jim embellished his piece with a burning wire to create a nice look at the same time hiding the glue joint created by attaching the block to the tube. The tube would be sanded and finished at this point.
Next, Jim glued together several pieces of contrasting wood into a block around 1" larger than the diameter of the tube, and about 3" in length. This piece was mounted and turned round on the outside slightly larger in diameter than the turned tube assembly. The inside was then hollowed to make a place for the rabbit joint on one side, and the object box on the other side. Great attention was paid to the fitting of the object box into the assembly and to the tube rabbit joint to assure a nice fit while rotating the object box assembly. A groove was cut to accept the washers used to secure the box assembly to the tube assembly, and a notch was created inside on the lip for the object box to allow access to insert and adjust the mounting screws added during final assembly. The piece was parted off and remounted to bevel and finish the exposed end. A beauty ring was turned to fit just in front of the object box to conceal the rim of the box itself. Jim also used a burning wire to accent this assembly. This assembly would be sanded and finished at this point.
Jim moved on to the assembly of the object box. He started with a PVC coupler. After turning out the center ridge inside, he parted it in half. Then he turned a small rabbit joint on the inside lip of both sides. He glued a round piece of florescent light diffusing glass cut to the correct size into one side, and then filled the box 1/3 of the way with bright and heavy colored glass material and other beads to refract the light. He glued a round of clear plexiglass to the other side enclosing the object box. A small hole was drilled into the side of the box, and glycerin was filled into the box leaving just a small air bubble so the objects can move freely, and the box will be able to expand or contract when the glycerin is heated or cooled. The hole was sealed and the box was complete.
Final assembly consisted of installing 3 long pieces of special mirror cut to fit into the triangular opening in the tube assembly. After the mirrors were sized and cut they were secured together with duct tape and glued into place inside the tube. Next was fitting the tube assembly and the rotational assembly together. Using 3 screws and washers, he installed the screws so the washers were riding in the groove cut into the rotational assembly and just tightened enough to allow the rotational assembly to move freely but still feel secure. Then the object box and beauty ring were glued into the rotational assembly using epoxy to assure a long lasting hold.
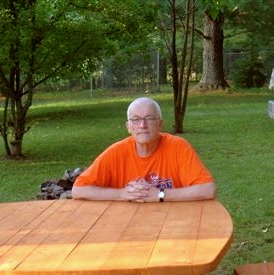
For more information on turning your own Kaleidoscope, contact Jim Meyer. Jim can be contacted via email at jmeyer@wvwoodturners.com.
by WVWA, a chapter of the American Association of WoodturnersReturn to the Events page